Tired of backbreaking trench digging? Want to save money on expensive equipment rentals? Building your own tractor-mounted trencher could be the solution. This guide compares DIY trenchers to professional options, providing step-by-step instructions for building your own, along with crucial safety and maintenance advice. We'll help you decide if this project is right for you and your tractor. For more tractor attachment ideas, check out this helpful resource.
Comparing DIY and Professional Trenchers
Before starting, understand the trade-offs. Professional trenchers offer precision, durability, and efficiency, but at a high price. DIY trenchers offer significant cost savings but may lack precision and durability. The best choice depends on your project's scale, soil conditions, budget, and mechanical skills.
Key Differences:
| Feature | DIY Trencher | Professional Trencher |
|---|---|---|
| Initial Cost | Very Low | High |
| Precision | Moderate | High |
| Durability | Moderate; lifespan depends on materials and use | High; built for heavy use |
| Soil Suitability | Best for softer soils; struggles with rocks and hard clay | Handles various soil types |
| Risk of Damage | Higher risk to tractor's hydraulic system | Lower risk |
| Maintenance | More frequent maintenance required | Less frequent maintenance |
Deciding if a DIY Trencher is Right for You
Several factors influence your decision:
- Project Scope: Small projects? DIY might suffice. Large-scale projects? A professional trencher likely saves time and effort.
- Soil Conditions: DIY excels in soft, loose soil. Rocky or clay-heavy soil requires a more robust (and likely professional) solution.
- Budget: DIY is cheaper upfront, but factor in potential repair costs.
- Mechanical Skills: You'll need basic welding and metalworking skills.
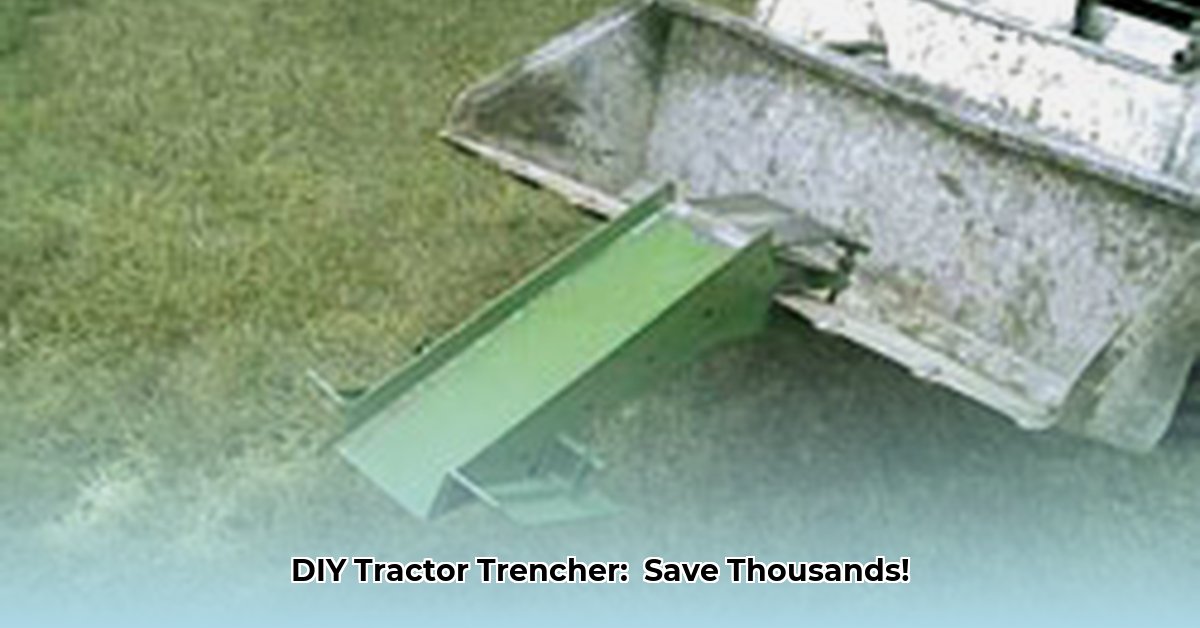
Building Your Homemade Tractor Trencher
This guide details a simple design using a modified tractor bucket. Always disconnect the PTO (Power Take-Off) before working on attachments.
Materials:
- Sturdy tractor bucket
- Thick steel plate (at least ¼ inch, possibly thicker depending on soil)
- Welding equipment and rods
- Bolts, nuts, washers
- Safety gear (welding mask, gloves, safety glasses)
Construction Steps:
- Design & Planning: Sketch dimensions. Consider trench depth, width, and bucket size.
- Digging Teeth Fabrication: Cut and shape steel plate to create digging teeth. Multiple smaller teeth are often better than fewer, larger ones for versatility in different soil types. Robustness is key to avoid breakage.
- Securing the Teeth: Weld the teeth securely to the bucket. Reinforce welds or use heavy-duty bolts for added strength.
- Testing: Test in soft soil before serious use. Adjust as needed.
Operating and Maintaining Your Homemade Trencher
Operate slowly and carefully, especially when reversing. Monitor hydraulic pressure. Regular inspection, lubrication, and prompt repairs extend lifespan.
Troubleshooting Common Problems
If stuck, don't force it! Reverse carefully. Regular maintenance prevents many issues.
Alternative Implement Options
Subsoilers break up hard soil, while box scrapers move large quantities of earth. Choose the right tool for the task.
Conclusion
DIY trenchers offer cost savings, but professional options provide greater precision and durability. Weigh the pros and cons carefully, prioritizing safety throughout the process.